After reading a blog post from someone who donated to Wikipedia because they use it a lot, I realised I use it a lot too, so I decided to donate too. Unfortunately I can’t quite remember who’s post it was, but thank you whoever you are!
I donated $30. You should too if you like Wikipedia, and you use it.
Author: Jason
-
I just donated to Wikipedia
-
Apache [warn] RSA server certificate CommonName (CN) does NOT match server name!?
Apache was giving me lots of errors like this on my host that has multiple virtual hosts on it.
[Mon Nov 10 13:54:01 2014] [warn] RSA server certificate CommonName (CN) `www.xxx.com.au' does NOT match server name!?
[Mon Nov 10 13:54:01 2014] [warn] RSA server certificate CommonName (CN) `www.yyy.com.au' does NOT match server name!?
[Mon Nov 10 13:54:01 2014] [warn] RSA server certificate CommonName (CN) `www.zzz.co.uk' does NOT match server name!?
[Mon Nov 10 13:54:01 2014] [warn] RSA server certificate CommonName (CN) `www.cocolo.com.au' does NOT match server name!?
[Mon Nov 10 13:54:01 2014] [warn] RSA server certificate CommonName (CN) `www.aaa.com.au' does NOT match server name!?
[Mon Nov 10 13:54:01 2014] [notice] Apache/2.2.22 (Debian) PHP/5.4.4-14+deb7u14 mod_ssl/2.2.22 OpenSSL/1.0.1e configured -- resuming normal operations
After a little investigation it turned out the CN in the certificate was set to www.domain but the vhost’s ServerName was set to www-less.
The solution turned out to be to ensure the vhost ServerName == the CN in the certificate. You can examine certificate with:certtool -i < domain.certAnd in the vhost, make sure there is a ServerAlias for the www-less version:
ServerName www.domainname.com.au
ServerAlias domainname.com.au
.
.
.
a few less warnings in the logs now. Phew!
-
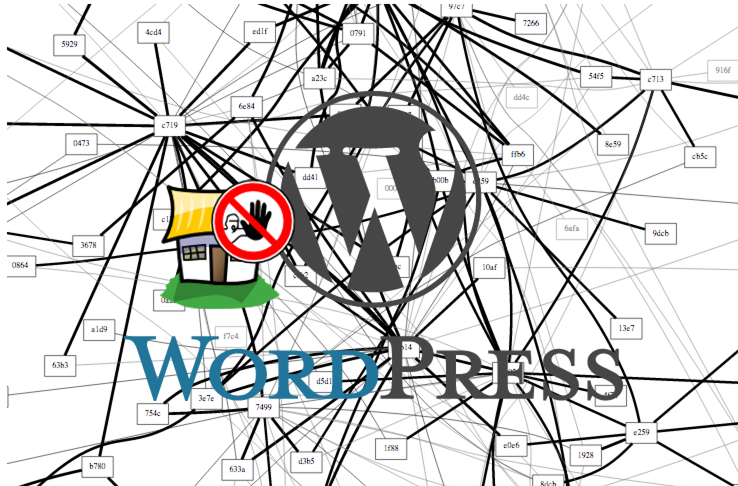
Using fail2ban to mitigate WordPress xmlrpc.php DDoS attacks
The other day my WordPress network went down. Upon investigation it turned out it was receiving a massive amount of http posts to the xmlrpc.php file. Apparently there is a WordPress DDoS that uses this mechanism. It brings apache and mysql to their knees as they can’t process the posts fast enough. If you search google for WordPress xmlrpc.php DDoS you can find lot more info about this.
An temporary fix is to block all access to that file from your apache configs with something like:<Files xmlrpc.php> Order allow,deny Deny from all </Files>That brought the load back to normal so I could at least access the WordPress backend.
After googling around for a solution it appeared that fail2ban could help. Luckily there is a plugin for that. WP fail2ban has two parts. The first is a plugin that enables logging of xmlrpc events and authentication events to/var/log/auth. It is important to keep these events separate from the normal http access logs as the access log file can get very large and fail2ban can raise the load significantly just processing it.
You also need to add a few configuration options to wp-config.phpdefine('WP_FAIL2BAN_LOG_PINGBACKS',true); # prevent user enumeration define('WP_FAIL2BAN_BLOCK_USER_ENUMERATION',true); # block some obviously invalid users define('WP_FAIL2BAN_BLOCKED_USERS','^testSee the readme for more details about what they do
The second part is enabling filters and gaols in fail2ban. Luckily this is also provided by the WP fail2ban plugin. Copy the wordpress.conf file from the wp-fail2ban directory to the fail2ban config directory:~# cp /var/www/wp-content/plugins/wp-fail2ban/wordpress.conf \ /etc/fail2ban/filter.d ~#Then edit /etc/jail.local and insert:
[wordpress]
enabled = true
filter = wordpress
logpath = /var/log/auth.log
# set the ban time to 1 hour - probably could be even higher for good measure
bantime = 3600
# needed for debian wheezy otherwise fail2ban doesn't start and reports
#   errors with the config
port = http,https
Now restart fail2ban:
~# /etc/init.d/fail2ban restart
[ ok ] Restarting authentication failure monitor: fail2ban.
~#
Remove the block on the xmlrpc.php file from your apache config and restart apache. Then you should see in your fail2ban logs something like:
2014-08-09 23:18:30,405 fail2ban.actions: WARNING [wordpress] Ban 117.195.37.14
2014-08-09 23:20:49,090 fail2ban.actions: WARNING [wordpress] Ban 78.97.220.237
2014-08-09 23:20:50,108 fail2ban.actions: WARNING [wordpress] Ban 46.108.226.105
2014-08-09 23:21:04,162 fail2ban.actions: WARNING [wordpress] Ban 120.28.140.93
2014-08-09 23:21:28,206 fail2ban.actions: WARNING [wordpress] Ban 175.142.187.77
2014-08-09 23:21:36,234 fail2ban.actions: WARNING [wordpress] Ban 88.240.97.76
2014-08-09 23:21:36,294 fail2ban.actions: WARNING [wordpress] Ban 122.177.229.110
2014-08-09 23:21:44,346 fail2ban.actions: WARNING [wordpress] Ban 89.106.102.15
2014-08-09 23:21:46,400 fail2ban.actions: WARNING [wordpress] Ban 2.122.219.188
2014-08-09 23:21:52,423 fail2ban.actions: WARNING [wordpress] Ban 95.69.53.13
2014-08-09 23:22:12,488 fail2ban.actions: WARNING [wordpress] Ban 5.12.12.66
2014-08-09 23:22:12,509 fail2ban.actions: WARNING [wordpress] Ban 182.182.89.23
2014-08-09 23:22:42,564 fail2ban.actions: WARNING [wordpress] Ban 178.36.126.249
2014-08-09 23:22:53,590 fail2ban.actions: WARNING [wordpress] Ban 36.83.125.10
2014-08-09 23:22:53,607 fail2ban.actions: WARNING [wordpress] Ban 95.231.59.185
I found however that I was being hit from over 1800 unique IP addresses and despite fail2ban successfully banning them, it was taking too long to ban enough that the load would return to normal so I re-blocked the xmlrpc.php file for 24 hours. After that, I enabled it and it seemed as though the DDoS had gone away. So far so good.
define('WP_FAIL2BAN_BLOCKED_USERS','^organictrader');See the readme for more details about what they do
The second part is enabling filters and gaols in fail2ban. Luckily this is also provided by the WP fail2ban plugin. Copy the wordpress.conf file from the wp-fail2ban directory to the fail2ban config directory:Then edit /etc/jail.local and insert:
Now restart fail2ban:
Remove the block on the xmlrpc.php file from your apache config and restart apache. Then you should see in your fail2ban logs something like:
I found however that I was being hit from over 1800 unique IP addresses and despite fail2ban successfully banning them, it was taking too long to ban enough that the load would return to normal so I re-blocked the xmlrpc.php file for 24 hours. After that, I enabled it and it seemed as though the DDoS had gone away. So far so good.
);
See the readme for more details about what they do
The second part is enabling filters and gaols in fail2ban. Luckily this is also provided by the WP fail2ban plugin. Copy the wordpress.conf file from the wp-fail2ban directory to the fail2ban config directory:Then edit /etc/jail.local and insert:
Now restart fail2ban:
Remove the block on the xmlrpc.php file from your apache config and restart apache. Then you should see in your fail2ban logs something like:
I found however that I was being hit from over 1800 unique IP addresses and despite fail2ban successfully banning them, it was taking too long to ban enough that the load would return to normal so I re-blocked the xmlrpc.php file for 24 hours. After that, I enabled it and it seemed as though the DDoS had gone away. So far so good.
-

Howto quickly find your Beaglebone Black’s IP address
Whenever I connect my Beaglebone Black (BBB) to a network, I have to work out it’s IP address so I can ssh into it. This can be tricky. Some of your options are:
- connect to the serial terminal, or connect over the usb network interface which gives the BBB the address 192.168.7.2, log in and issue the command
ip addr. - use
nmapto try and search out its IP address on your subnet but this is time consuming and not very accurate I have found. - use
avahi-browse -rat(thanks Madox for that tip.)
Last night I came up with a Better Way™. Rather than trying to determine the BBB’s address, why not use a fully qualified domain name and a dynamic dns service? I could then just type
ssh myfqdn.comor whatever and log in. Think how that would simplify one’s life!
To implement this, set up a dynamic DNS somewhere with a FQDN for your BBB. If you happen to have your own domain name already you can use a sub-domain from that. I think its fairly common for DNS hosts to offer an API to update your IP address. I happen to use Rimu Hosting and they have their own simple web api.
Then you just need to write a little script to update the IP address every time the DHCP client receives a new IP address, and drop it into/etc/dhcp/dhclient-exit-hooks.d/
Here is my script. This will only work with Rimu Hosting as they have their own privately developed API, and you’d need to insert your own KEY into the script.#!/bin/bash # update ip address with rimu hosting. See https://rimuhosting.com/dns/dyndns.jsp if [[ ! -z ${new_ip_address} ]] then echo $(date +"%F %T") ${new_ip_address} >> /root/ddns.txt curl "https://rimuhosting.com/dns/dyndns.jsp?action=SET&name=clock.emacstragic.net&value=${new_ip_address}&type=A&api_key=XXX" else echo "got no ip" fiUpdate:
I discovered this didn’t work at home. Turns out that dnsmasq in OpenWRT is set to ignore this kind of dns request, due to potential security risks. There is a solution to that. Add a
list rebind_domainline to your /etc/config/dhcp line on the router.config dnsmasq . . . list rebind_domain 'clock.emacstragic.net'
Thanks to Michal Čihař for the solution to that.
- connect to the serial terminal, or connect over the usb network interface which gives the BBB the address 192.168.7.2, log in and issue the command
-
Facebook selecting wrong thumbnail for WordPress links
Does Facebook keep selecting the wrong thumbnail for WordPress links for you? The solution is to give Facebook some extra instruction about what image to use for the thumbnail, using open graph.
If you use a static frontpage, it’s a simple matter of adding something like:
<meta property="og:image" content="http://samplesite.com/files/2014/05/web-thumb.png" />
to the Full meta tags of your front page.
You can check what facebook will do with your site by using their link debugger: https://developers.facebook.com/tools/debug
WordPress >= 3.9.1 seems to do the right thing for posts according to my testing. -
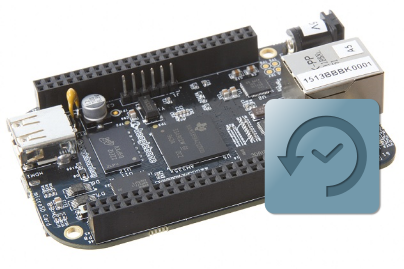
Backup your Beaglebone Black
Using a method I previously wrote about, it’s quite easy to backup your Beaglebone Black over the network.
ssh root@bbb 'tar cf - / 2>/dev/null' | pv -cN tar \
   | bzip2 | pv -cN bzip2 > bbb-backup-tar.bz2
It runs the bzip compression locally because presumably it will be faster than on the Beaglebone Black. I didn’t actually test that hypothesis though.
pv gives nice little indicators:bzip2: 1.81MB 0:00:12 [ 995kB/s] [ <=> ] tar: 36.2MB 0:00:12 [3.84MB/s] [ <=> ] -

Printing from Windows to a samba shared CUPS-PDF printer sometimes fails
I had this problem where prints to our CUPS-PDF printer sometimes failed to be processed on the server. The job would disappear as though it has been printed but nothing else would happen. Printing from the same application to a Windows based PDF printer, and then printing the resulting PDF via Adobe Acrobat to the CUPS PDF printer would work fine. Printing the same PDF via Sumatra PDF to CUPS-PDF would also fail.
Further investigation revealed that the resulting print job files would differ. The jobs that fail looked like they contained a lot of binary data but the ones that succeeded looked like normal PDF files.
Then I discovered this entry in the Windows Event Viewer:
The document XXXX, owned by jason, failed to print on printer \\server\PDF. Try to print the document again, or restart the print spooler.

Data type: NT EMF 1.008. Size of the spool file in bytes: 2555904. Number of bytes printed: 0. Total number of pages in the document: 1. Number of pages printed: 0. Client computer: \\CLIENT. Win32 error code returned by the print processor: 0. The operation completed successfully.
Googleing that error took me to this RPi forum which had a solution buried down near the bottom. Thanks to Chemirocha for that tip. This bug has been plaguing me for a few years on and off! -

automysqlbackup ERRORS REPORTED: MySQL Backup error Log Warning: Skipping the data of table mysql.event. Specify the –events option explicitly.
I was receiving email error messages from cron like this from my autbackupmysql on a regular basis:
ERRORS REPORTED: MySQL Backup error Log for somehost.com.dxa - 2014-05-01_06h26m

-- Warning: Skipping the data of table mysql.event. Specify the --events option explicitly.
It turns out that mysqldump now warns you if the events table is not being dumped. So to get rid of the warning either ensure the table gets dumped when you do a backup or tell mysql explicitly not to dump it. I chose the former approach as it is a backup after all.
Simply add the following line to /etc/mysql/my.cnf
[mysqldump]

...

...

...

events
This tells the mysqldump program to explicity include the events table, and removes the warning. You can see a discussion about this option here.
If you are using debian, you will need to add that section to the /etc/mysql/debian.cnf file also as automysqlbackup uses that file for its configuration instead. See debian bug report for more details. -
increase wordpress Maximum upload file size beyond 8MB.
There is at least three places you need to set the maximum upload file size in WordPress.
First check your php.ini
upload_max_filesize = 64M;

post_max_size = 64M;
Restart Apache after making this change.
Then if you are using WordPress multi-site, you need change a setting in the backend. Visit My Sites -> Network Admin -> Dashboard -> Settings -> Network Settings. Then scroll down to the Upload Settings area and change that.
Thanks to dorr13 for that tip. -
How to create debian init.d startup script
From time to time I need to create an init.d startup script for a program that is not part of the default debian distribution. I’ve always found it unnecessarily fiddly to create a new script. The other day I came across naholyr’s gist, a script to make init.d scripts.
There were a few problems with it so I made it into a proper github project and fixed up the problems. The url it was retrieving the service.sh script from was 404, and it wasn’t checking for successful download of the script, so I made it abort if it fails to download.
I couldn’t come up with a decent name for it so its called sample-service-script.
I already had a few pull request to it, yay!