Seriously fuck Microsoft! This camera would work fine if MS didn’t default to making windows think your local power is 60Hz. We were suffering a lot of screen flicker with this camera making it almost unusable when the lights were on in the room.
After much searching I found you can fix it by running the Logitech Camera Settings app and choosing 50Hz under advanced settings.
But before finding that solution, found this: https://github.com/apankowski/linux-logitech-camera-flicker-fix. Thanks to Andrzej Pańkowski for pointing the way.
Category: Linux
-

Logitech BCC950 Camera Flicker
-
TIL about lolcat CLI cat alternative. Create rainbow colouring effect
It makes beautiful output like this:
you can convert it to html by piping through aha too:
lolcat -f system-info.txt | aha > tmp.htmlHTML output here.
-
Let’s Encrypt when your server is behind a firewall and you can’t use DNS Challenge
Sometimes you want to give a server that is behind a firewall a valid SSL certificate. Let’s Encrypt provides a nice solution for this called DNS Challenge. The problem with DNS Challenge is it may require some manual configuring to on your server to set it up. That is all fine and good but sometimes the server won’t allow you to do that configure. A classic example is the hass.io (Home Assistant) appliance or FreePBX
I couldn’t find a coherent set of instructions for setting up Let’s Encrypt DNS Challenges with hassio, especially as my DNS provider requires custom scripts in order to achieve this.
However, I came up with a work around. First let’s think about how Let’s Encrypt (LE) usually works. Suppose you want to get a certificate for my.example.com (MEC), but my.example.com is NATed behind example.com’s (EC) IP address. When you run the LE client on MEC, it requests the LE servers to do a challenge request to MEC. MEC will have the same public IP as EC. the client on MEC will some information on the MEC server at the <webroot>/.well-known/acme-challenge. The LE servers will try and query it. If they find what they are looking for, they issue you the certificate.
So I got to thinking, as this request takes place on port 80, it must contain the domain name header, and so, if you run an web server on port 80 of EC and A entry for MEC the same public IP address as EC, EC could simply proxy that request to the MEC server.
I looked up how to do this and set it up on my server and low and behold, I was able to get a valid certificate.
In my case I did it with nginx , so the config looked like this:
On my server on port 80 (example.com) of the firewall in /etc/nginx/sites-available/my.example.com:
server {
       server_name my.example.com;
       location / {
       		proxy_pass http://192.168.1.9:80/;
		proxy_set_header Host $http_host;
	}
}
Then symlink it to /etc/nginx/sites-enabled/my.example.com and test the nginx config:
$ sudo ln -s /etc/nginx/sites-available/my.example.com  /etc/nginx/sites-enabled/my.example.com
$ sudo nginx -t
[sudo] password for jason:
nginx: the configuration file /etc/nginx/nginx.conf syntax is ok
nginx: configuration file /etc/nginx/nginx.conf test is successful
Restart nginx:
sudo systemctl restart nginx.serviceNow start your Let’s Encrypt certificate request on your server and you should be good to go.
-
MSSQL ODBC Client on Debian 9 Stretch
Many years ago fREW Schmidt wrote a very handy article on installing MSSQL ODBC drivers in debian. Since then Microsoft have improved their support of debian somewhat and things have changed making it easier to install, however they still (as at 2017-11-06) have not released proper drivers for Debian Stretch.
Add the microsoft repoecho 'deb [arch=amd64] https://packages.microsoft.com/debian/8/prod jessie main' > /etc/apt/sources.list.d/mssql-release.listAdd the key
curl https://packages.microsoft.com/keys/microsoft.asc | sudo apt-key add -
then update and install
sudo apt update
sudo apt install msodbcsql mssql-tools
If you try and connect to sql now you get an obscure error like this:
/opt/mssql-tools/bin/sqlcmd -S 10.0.2.13 -U xxx -P yyy
Sqlcmd: Error: Microsoft ODBC Driver 13 for SQL Server : Can't open lib '/opt/microsoft/msodbcsql/lib64/libmsodbcsql-13.1.so.9.1' : file not found.
But the file exists:
$ file /opt/mssql-tools/bin/sqlcmd
/opt/mssql-tools/bin/sqlcmd: ELF 64-bit LSB executable, x86-64, version 1 (GNU/Linux), dynamically linked, interpreter /lib64/ld-linux-x86-64.so.2, for GNU/Linux 2.6.32, BuildID[sha1]=21a353af470e7849544daab892ec9b1bfc36dc87, not stripped
This somewhat misleading error is actually due to the
libmsodbcsqllib being linked against a very specific version of libssl. Check the output of ldd:$ ldd /opt/microsoft/msodbcsql/lib64/libmsodbcsql-13.1.so.9.1 | grep 'not found' libcrypto.so.1.0.0 => not found libssl.so.1.0.0 => not foundBut it turns out this can easily be solved by manually installing the libssl package from Debian Jessie:
wget "http://security.debian.org/debian-security/pool/updates/main/o/openssl/libssl1.0.0_1.0.1t-1+deb8u7_amd64.deb"
sudo apt install ./libssl1.0.0_1.0.1t-1+deb8u7_amd64.deb
then you should be back in business.
-
convert mp3 to m4b on the linux command line
I quite often want to convert mp3 files to m4b, Apple’s proprietary nastiness. There is pacpl of course but that has issues these days, particularly with copying the id3 tags to the new file.
FFmpeg can do it when you build from source (I just found a nice script that will build it from source for you). So I came up with this way to do it from the command line. It uses an awesome feature of xargs which will run it in parallel, so one for each core.find -type f -name \*.mp3 \ | xargs -n 1 -P $(getconf _NPROCESSORS_ONLN || echo 1) -i \ bash -c \ 'i="{}"; ffmpeg -y -i "$i" -map_metadata 0 \ -c copy -c:a libfdk_aac -b:a 128k\ -map_metadata:s:a 0:s:a -f ipod "${i%.*}.m4b"'What that does is:
- find all the mp3 files and pipe their names into xargs
- then get the number of cores available and pass that to the -P argument
- and run ffmpeg and map all the metadata to the new file
- and strip off the mp3 file extension and add m4b to it
There! Nothing to it!
Update 2017-03-23: Added double quotes around the bash variable $i to cope with spaces. You should always do this (and so should I)
Update 2018-12-20: Added “-c copy” so ffmpeg can cope with album art in the file -
FreeTDS is a bag of razorblades use, Microsoft ODBC Driver for Linux instead
According to @mst FreeTDS is a bag of razorblades.
That’s right folks, don’t use it. The new way to go is Microsoft ODBC Driver for SQL Server on Linux.
Unfortunately its a nightmare to install on debian. Luckily some very smart people wrote a lovely little howto: Install and Configure the MS ODBC Driver on Debian. -

Using fail2ban to mitigate WordPress xmlrpc.php DDoS attacks
The other day my WordPress network went down. Upon investigation it turned out it was receiving a massive amount of http posts to the xmlrpc.php file. Apparently there is a WordPress DDoS that uses this mechanism. It brings apache and mysql to their knees as they can’t process the posts fast enough. If you search google for WordPress xmlrpc.php DDoS you can find lot more info about this.
An temporary fix is to block all access to that file from your apache configs with something like:<Files xmlrpc.php> Order allow,deny Deny from all </Files>That brought the load back to normal so I could at least access the WordPress backend.
After googling around for a solution it appeared that fail2ban could help. Luckily there is a plugin for that. WP fail2ban has two parts. The first is a plugin that enables logging of xmlrpc events and authentication events to/var/log/auth. It is important to keep these events separate from the normal http access logs as the access log file can get very large and fail2ban can raise the load significantly just processing it.
You also need to add a few configuration options to wp-config.phpdefine('WP_FAIL2BAN_LOG_PINGBACKS',true); # prevent user enumeration define('WP_FAIL2BAN_BLOCK_USER_ENUMERATION',true); # block some obviously invalid users define('WP_FAIL2BAN_BLOCKED_USERS','^testSee the readme for more details about what they do
The second part is enabling filters and gaols in fail2ban. Luckily this is also provided by the WP fail2ban plugin. Copy the wordpress.conf file from the wp-fail2ban directory to the fail2ban config directory:~# cp /var/www/wp-content/plugins/wp-fail2ban/wordpress.conf \ /etc/fail2ban/filter.d ~#Then edit /etc/jail.local and insert:
[wordpress]
enabled = true
filter = wordpress
logpath = /var/log/auth.log
# set the ban time to 1 hour - probably could be even higher for good measure
bantime = 3600
# needed for debian wheezy otherwise fail2ban doesn't start and reports
#   errors with the config
port = http,https
Now restart fail2ban:
~# /etc/init.d/fail2ban restart
[ ok ] Restarting authentication failure monitor: fail2ban.
~#
Remove the block on the xmlrpc.php file from your apache config and restart apache. Then you should see in your fail2ban logs something like:
2014-08-09 23:18:30,405 fail2ban.actions: WARNING [wordpress] Ban 117.195.37.14
2014-08-09 23:20:49,090 fail2ban.actions: WARNING [wordpress] Ban 78.97.220.237
2014-08-09 23:20:50,108 fail2ban.actions: WARNING [wordpress] Ban 46.108.226.105
2014-08-09 23:21:04,162 fail2ban.actions: WARNING [wordpress] Ban 120.28.140.93
2014-08-09 23:21:28,206 fail2ban.actions: WARNING [wordpress] Ban 175.142.187.77
2014-08-09 23:21:36,234 fail2ban.actions: WARNING [wordpress] Ban 88.240.97.76
2014-08-09 23:21:36,294 fail2ban.actions: WARNING [wordpress] Ban 122.177.229.110
2014-08-09 23:21:44,346 fail2ban.actions: WARNING [wordpress] Ban 89.106.102.15
2014-08-09 23:21:46,400 fail2ban.actions: WARNING [wordpress] Ban 2.122.219.188
2014-08-09 23:21:52,423 fail2ban.actions: WARNING [wordpress] Ban 95.69.53.13
2014-08-09 23:22:12,488 fail2ban.actions: WARNING [wordpress] Ban 5.12.12.66
2014-08-09 23:22:12,509 fail2ban.actions: WARNING [wordpress] Ban 182.182.89.23
2014-08-09 23:22:42,564 fail2ban.actions: WARNING [wordpress] Ban 178.36.126.249
2014-08-09 23:22:53,590 fail2ban.actions: WARNING [wordpress] Ban 36.83.125.10
2014-08-09 23:22:53,607 fail2ban.actions: WARNING [wordpress] Ban 95.231.59.185
I found however that I was being hit from over 1800 unique IP addresses and despite fail2ban successfully banning them, it was taking too long to ban enough that the load would return to normal so I re-blocked the xmlrpc.php file for 24 hours. After that, I enabled it and it seemed as though the DDoS had gone away. So far so good.
define('WP_FAIL2BAN_BLOCKED_USERS','^organictrader');See the readme for more details about what they do
The second part is enabling filters and gaols in fail2ban. Luckily this is also provided by the WP fail2ban plugin. Copy the wordpress.conf file from the wp-fail2ban directory to the fail2ban config directory:Then edit /etc/jail.local and insert:
Now restart fail2ban:
Remove the block on the xmlrpc.php file from your apache config and restart apache. Then you should see in your fail2ban logs something like:
I found however that I was being hit from over 1800 unique IP addresses and despite fail2ban successfully banning them, it was taking too long to ban enough that the load would return to normal so I re-blocked the xmlrpc.php file for 24 hours. After that, I enabled it and it seemed as though the DDoS had gone away. So far so good.
);
See the readme for more details about what they do
The second part is enabling filters and gaols in fail2ban. Luckily this is also provided by the WP fail2ban plugin. Copy the wordpress.conf file from the wp-fail2ban directory to the fail2ban config directory:Then edit /etc/jail.local and insert:
Now restart fail2ban:
Remove the block on the xmlrpc.php file from your apache config and restart apache. Then you should see in your fail2ban logs something like:
I found however that I was being hit from over 1800 unique IP addresses and despite fail2ban successfully banning them, it was taking too long to ban enough that the load would return to normal so I re-blocked the xmlrpc.php file for 24 hours. After that, I enabled it and it seemed as though the DDoS had gone away. So far so good.
-
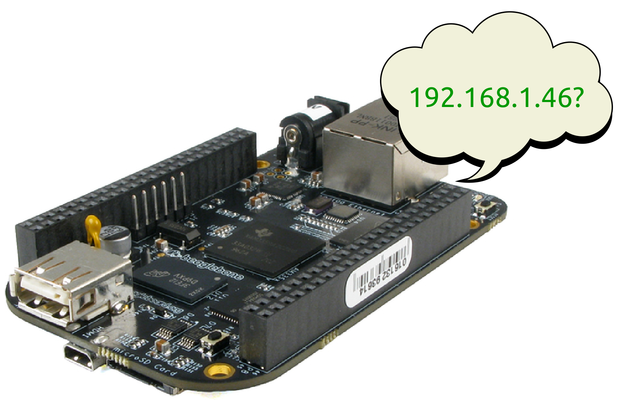
Howto quickly find your Beaglebone Black’s IP address
Whenever I connect my Beaglebone Black (BBB) to a network, I have to work out it’s IP address so I can ssh into it. This can be tricky. Some of your options are:
- connect to the serial terminal, or connect over the usb network interface which gives the BBB the address 192.168.7.2, log in and issue the command
ip addr. - use
nmapto try and search out its IP address on your subnet but this is time consuming and not very accurate I have found. - use
avahi-browse -rat(thanks Madox for that tip.)
Last night I came up with a Better Way™. Rather than trying to determine the BBB’s address, why not use a fully qualified domain name and a dynamic dns service? I could then just type
ssh myfqdn.comor whatever and log in. Think how that would simplify one’s life!
To implement this, set up a dynamic DNS somewhere with a FQDN for your BBB. If you happen to have your own domain name already you can use a sub-domain from that. I think its fairly common for DNS hosts to offer an API to update your IP address. I happen to use Rimu Hosting and they have their own simple web api.
Then you just need to write a little script to update the IP address every time the DHCP client receives a new IP address, and drop it into/etc/dhcp/dhclient-exit-hooks.d/
Here is my script. This will only work with Rimu Hosting as they have their own privately developed API, and you’d need to insert your own KEY into the script.#!/bin/bash # update ip address with rimu hosting. See https://rimuhosting.com/dns/dyndns.jsp if [[ ! -z ${new_ip_address} ]] then echo $(date +"%F %T") ${new_ip_address} >> /root/ddns.txt curl "https://rimuhosting.com/dns/dyndns.jsp?action=SET&name=clock.emacstragic.net&value=${new_ip_address}&type=A&api_key=XXX" else echo "got no ip" fiUpdate:
I discovered this didn’t work at home. Turns out that dnsmasq in OpenWRT is set to ignore this kind of dns request, due to potential security risks. There is a solution to that. Add a
list rebind_domainline to your /etc/config/dhcp line on the router.config dnsmasq . . . list rebind_domain 'clock.emacstragic.net'
Thanks to Michal Čihař for the solution to that.
- connect to the serial terminal, or connect over the usb network interface which gives the BBB the address 192.168.7.2, log in and issue the command
-
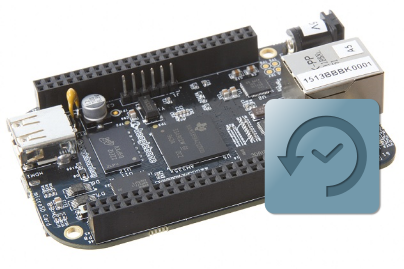
Backup your Beaglebone Black
Using a method I previously wrote about, it’s quite easy to backup your Beaglebone Black over the network.
ssh root@bbb 'tar cf - / 2>/dev/null' | pv -cN tar \
   | bzip2 | pv -cN bzip2 > bbb-backup-tar.bz2
It runs the bzip compression locally because presumably it will be faster than on the Beaglebone Black. I didn’t actually test that hypothesis though.
pv gives nice little indicators:bzip2: 1.81MB 0:00:12 [ 995kB/s] [ <=> ] tar: 36.2MB 0:00:12 [3.84MB/s] [ <=> ] -

Printing from Windows to a samba shared CUPS-PDF printer sometimes fails
I had this problem where prints to our CUPS-PDF printer sometimes failed to be processed on the server. The job would disappear as though it has been printed but nothing else would happen. Printing from the same application to a Windows based PDF printer, and then printing the resulting PDF via Adobe Acrobat to the CUPS PDF printer would work fine. Printing the same PDF via Sumatra PDF to CUPS-PDF would also fail.
Further investigation revealed that the resulting print job files would differ. The jobs that fail looked like they contained a lot of binary data but the ones that succeeded looked like normal PDF files.
Then I discovered this entry in the Windows Event Viewer:
The document XXXX, owned by jason, failed to print on printer \\server\PDF. Try to print the document again, or restart the print spooler.

Data type: NT EMF 1.008. Size of the spool file in bytes: 2555904. Number of bytes printed: 0. Total number of pages in the document: 1. Number of pages printed: 0. Client computer: \\CLIENT. Win32 error code returned by the print processor: 0. The operation completed successfully.
Googleing that error took me to this RPi forum which had a solution buried down near the bottom. Thanks to Chemirocha for that tip. This bug has been plaguing me for a few years on and off!