Today with the help of two other members, elisa and xph I created ##palestine on the libera IRC network.
Drop by and say hello:
https://web.libera.chat/?channel=##palestine
or

Today with the help of two other members, elisa and xph I created ##palestine on the libera IRC network.
Drop by and say hello:
https://web.libera.chat/?channel=##palestine
or
Discord will often require you to install an update. When this happens it quits itself and auto downloads the latest .deb, but you end up with lots of sequentially numbered versions of the .deb so it’s fiddly to find and install the latest one.
I came up with this approach to apt install the most recent one:
sudo apt install \
   $(find /home/jason/Downloads/ \
       -name 'discord*.deb' -type f -printf '%T+ %p\n' | \
      sort -r | head -1 | cut -d' ' -f2)
or you can build it into a bash function:
update-discord()
{
sudo apt install \
  $(find /home/jason/Downloads/ -name 'discord*.deb' -type f -printf '%T+ %p\n' | \
  sort -r | head -1 | cut -d' ' -f2)
}
One could also consider deleting the .deb after successful install. That is an excercise left for the reader
Palestine will be free, from the river to the sea.
I stand with Palestine.
I ❤️ 🇵🇸
There are a number of unofficial discords for WSJ2023. In particular for The IST team there is this one:
https://discord.com/invite/A7rByrD WSJ2023 IST
I was finding it really difficult to get the information I need from the Newsletters so I made one big searchable document with all the WSJ2023 Newsletters in one big file.
I’ll endeavour to update it when new Newsletters come out
pdftk WSJ2023-Newsletter-*.pdf cat output WSJ2023-Newsletters1-3b.pdf
mkdir tmp
cp WSJ2023-Newsletters1-3b.pdf tmp
cd tmp
pdftohtml -p -c -s -noframes WSJ2023-Newsletters1-3b.pdfI moved my site to a new host. If you can see this, you are viewing the new host.
Ben asked if I could share my ESPHome configuration for the Arlec device. Here it is:
esphome:
  name: master_bedroom_heater
  platform: ESP8266
  board: esp01_1m
#  esp8266_restore_from_flash: True
wifi:
  networks:
    - ssid: !secret work_ssid
      password: !secret work_psk
    - ssid: !secret home_ssid
      password: !secret home_psk
# Enable logging
logger:
# Enable Home Assistant API
api:
  password: !secret ha_api_pw
ota:
  password: !secret ota_pw
binary_sensor:
  - platform: gpio
    pin:
      number: GPIO14
      mode: INPUT_PULLUP
      inverted: True
    name: "master br heater Button"
    on_press:
      - switch.toggle: mr_br_heater
  - platform: status
    name: "master bedroom heater status"
switch:
  - platform: gpio
    name: "Master Bedroom Heater"
    pin:
      number: GPIO12
    id: mr_br_heater
    restore_mode: RESTORE_DEFAULT_OFF
    on_turn_on:
      light.turn_on:
        id: mr_br_led1
    on_turn_off:
      light.turn_off:
        id: mr_br_led1
light:
  - platform: binary
    name: "led1"
    output: led1
    id: mr_br_led1
  - platform: binary
    name: "led2"
    output: led2
output:
  - platform: gpio
    pin:
      number: GPIO04
    id: led2
    inverted: True
  - platform: gpio
    pin:
      number: GPIO13
    id: led1
    inverted: True
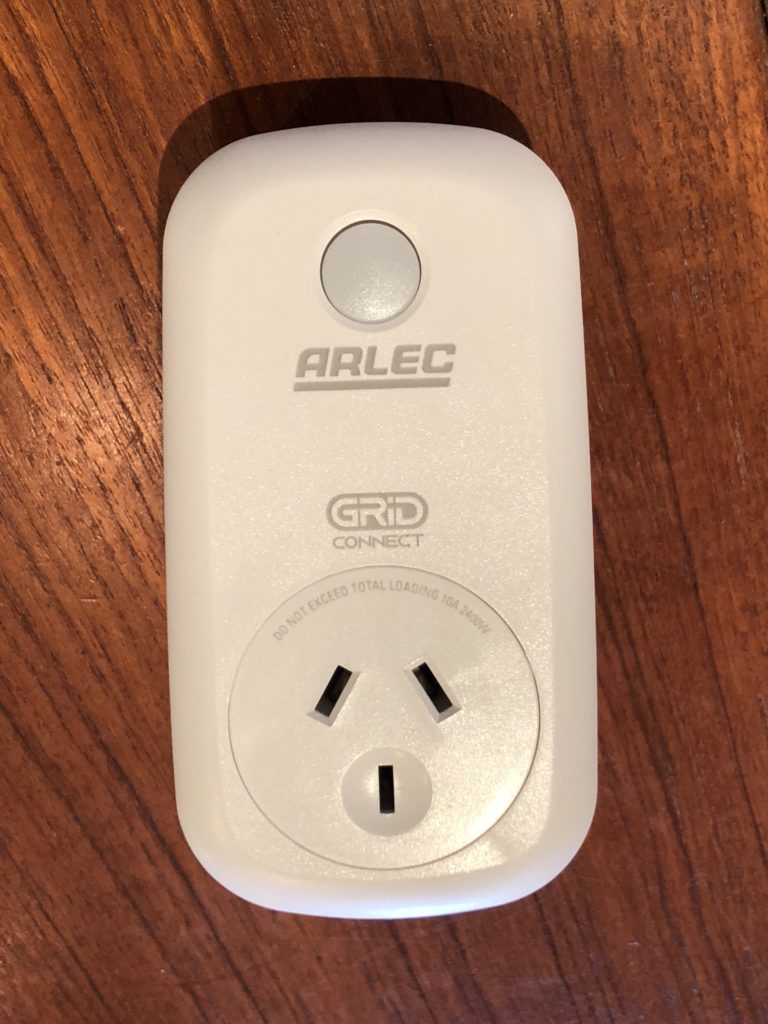
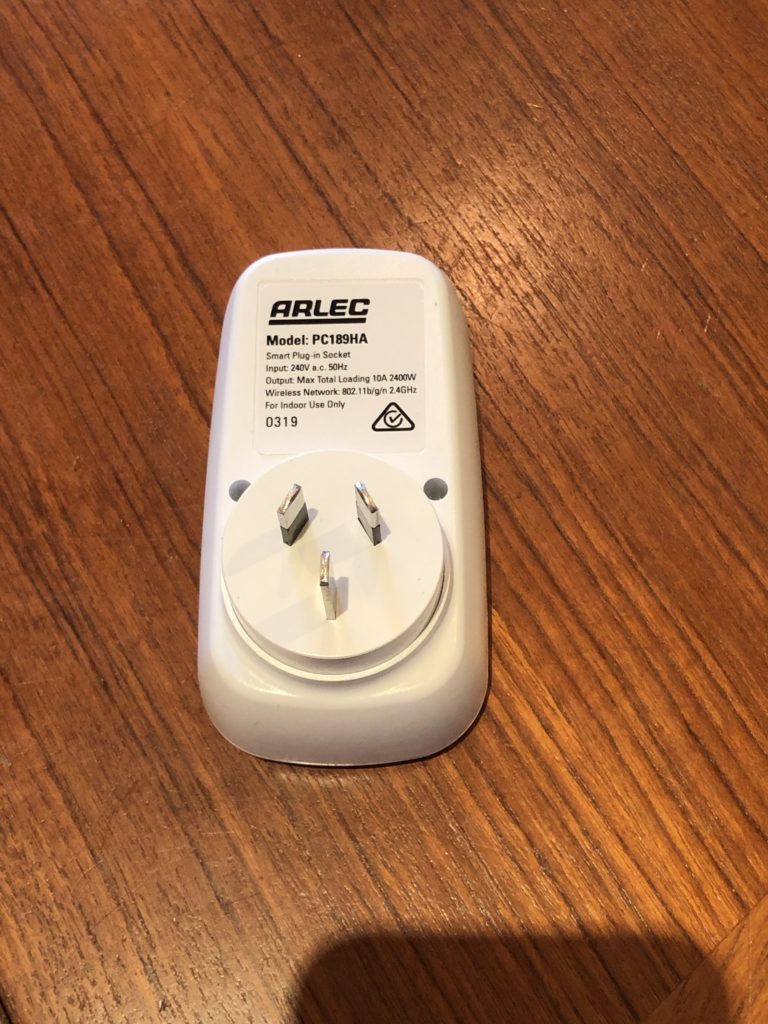
I got some of these Arlec Smart Plug In Sockets from Bunnings. Apparently they are Tuya devices but I decided to take the brute force approach to putting ESPHome on the.
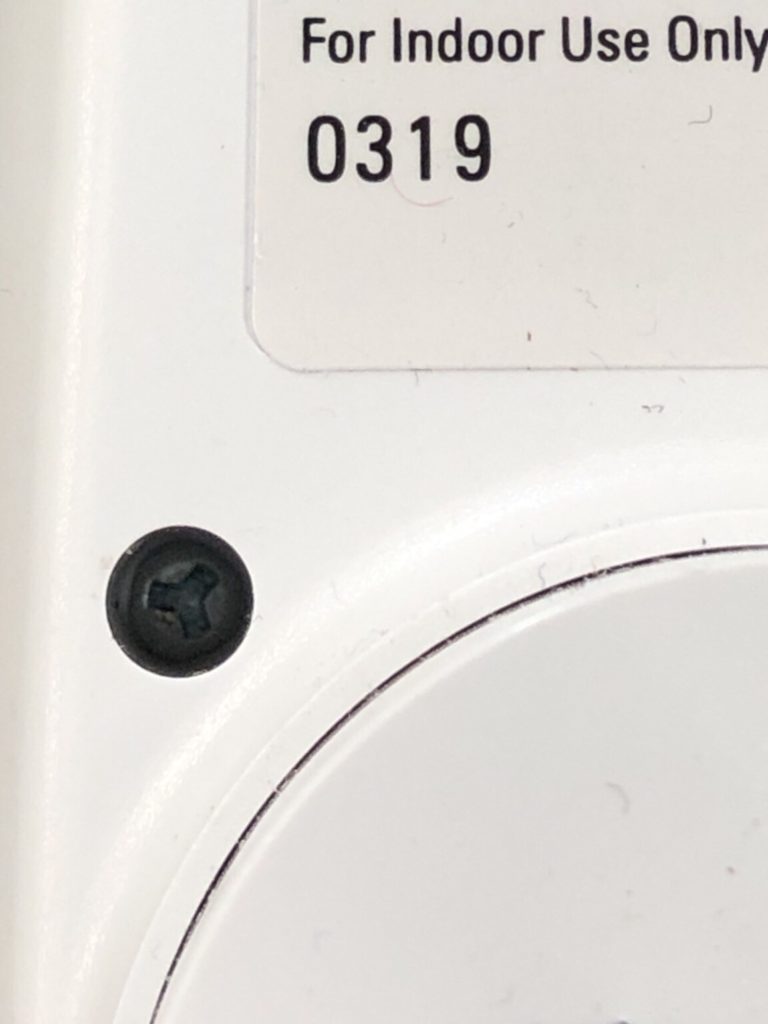
First challenge was getting the tri point screw out. I had to buy a special screwdriver for this.
Once I got the screws out, it was easy to unclip the case and open it.
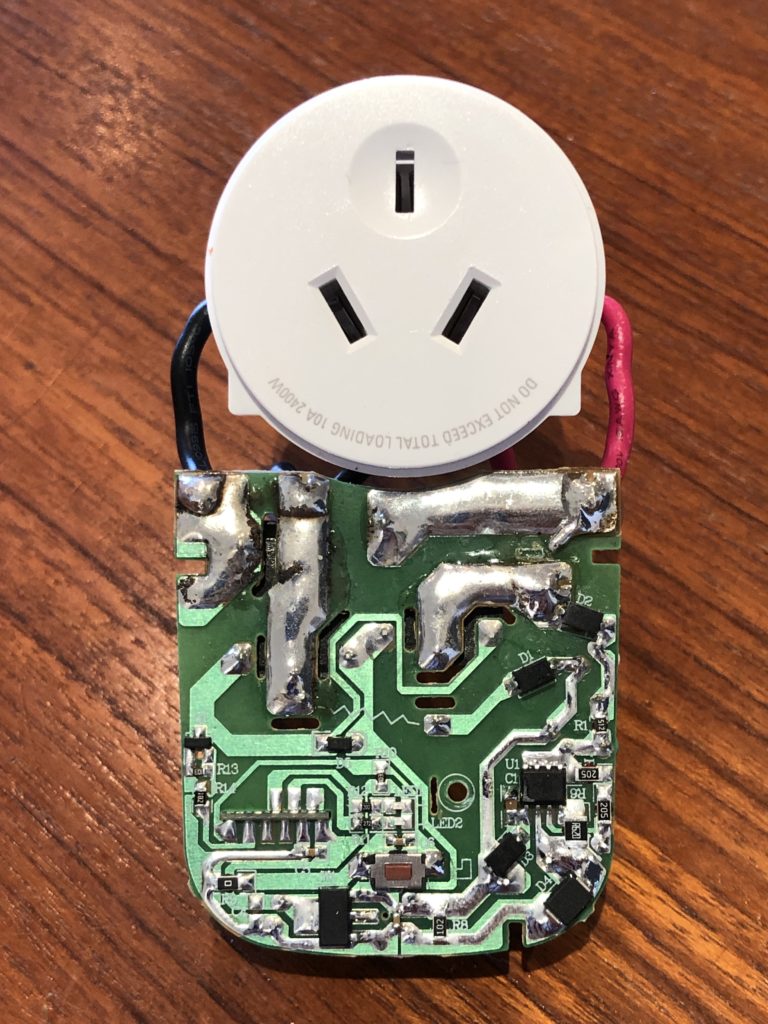
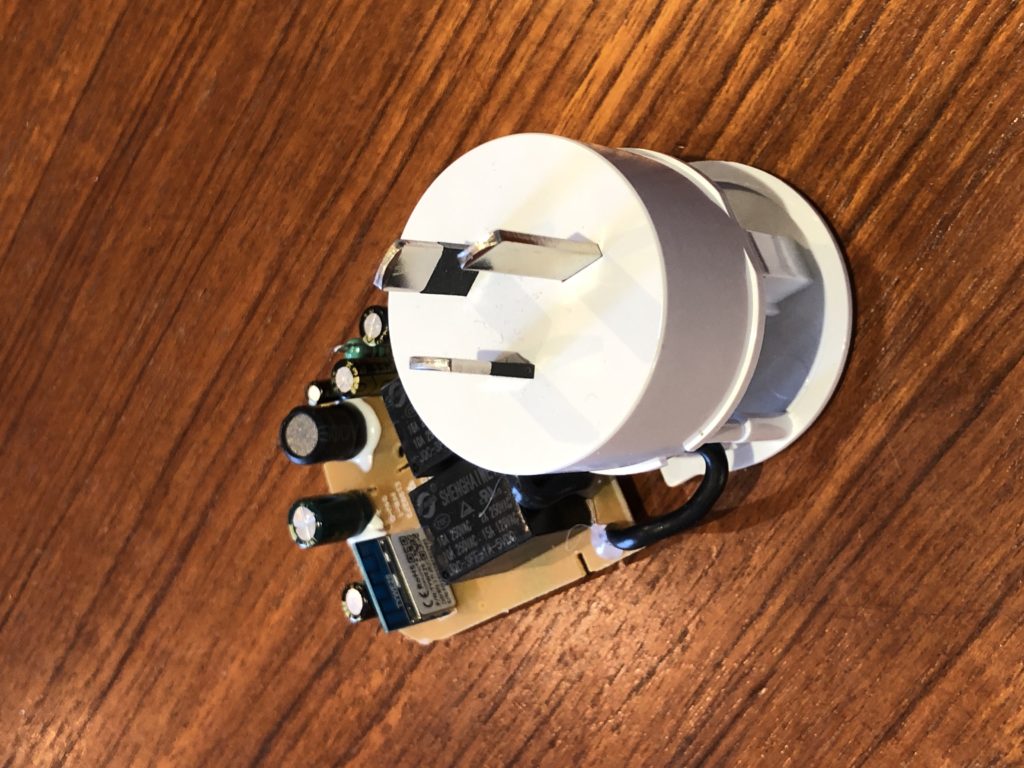
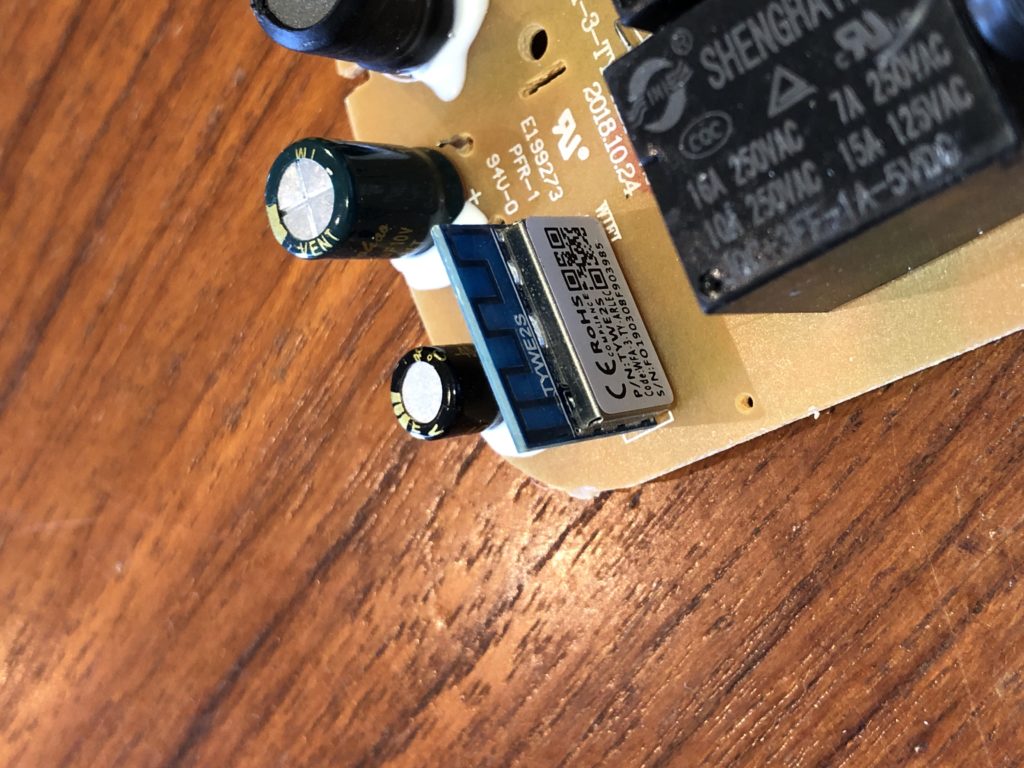
After tracing the circuit, I decided to solder wires to the board and connect them to my USB->Serial adapter. The only tricky part was that you have to hold GPIO0 at ground when you power up the esp8266 to get it into flash mode. I just held a wire on the tiny GPIO0 pad on the TYWE2S.