I decided to make something special for the inaugural Australian emacs meetup.
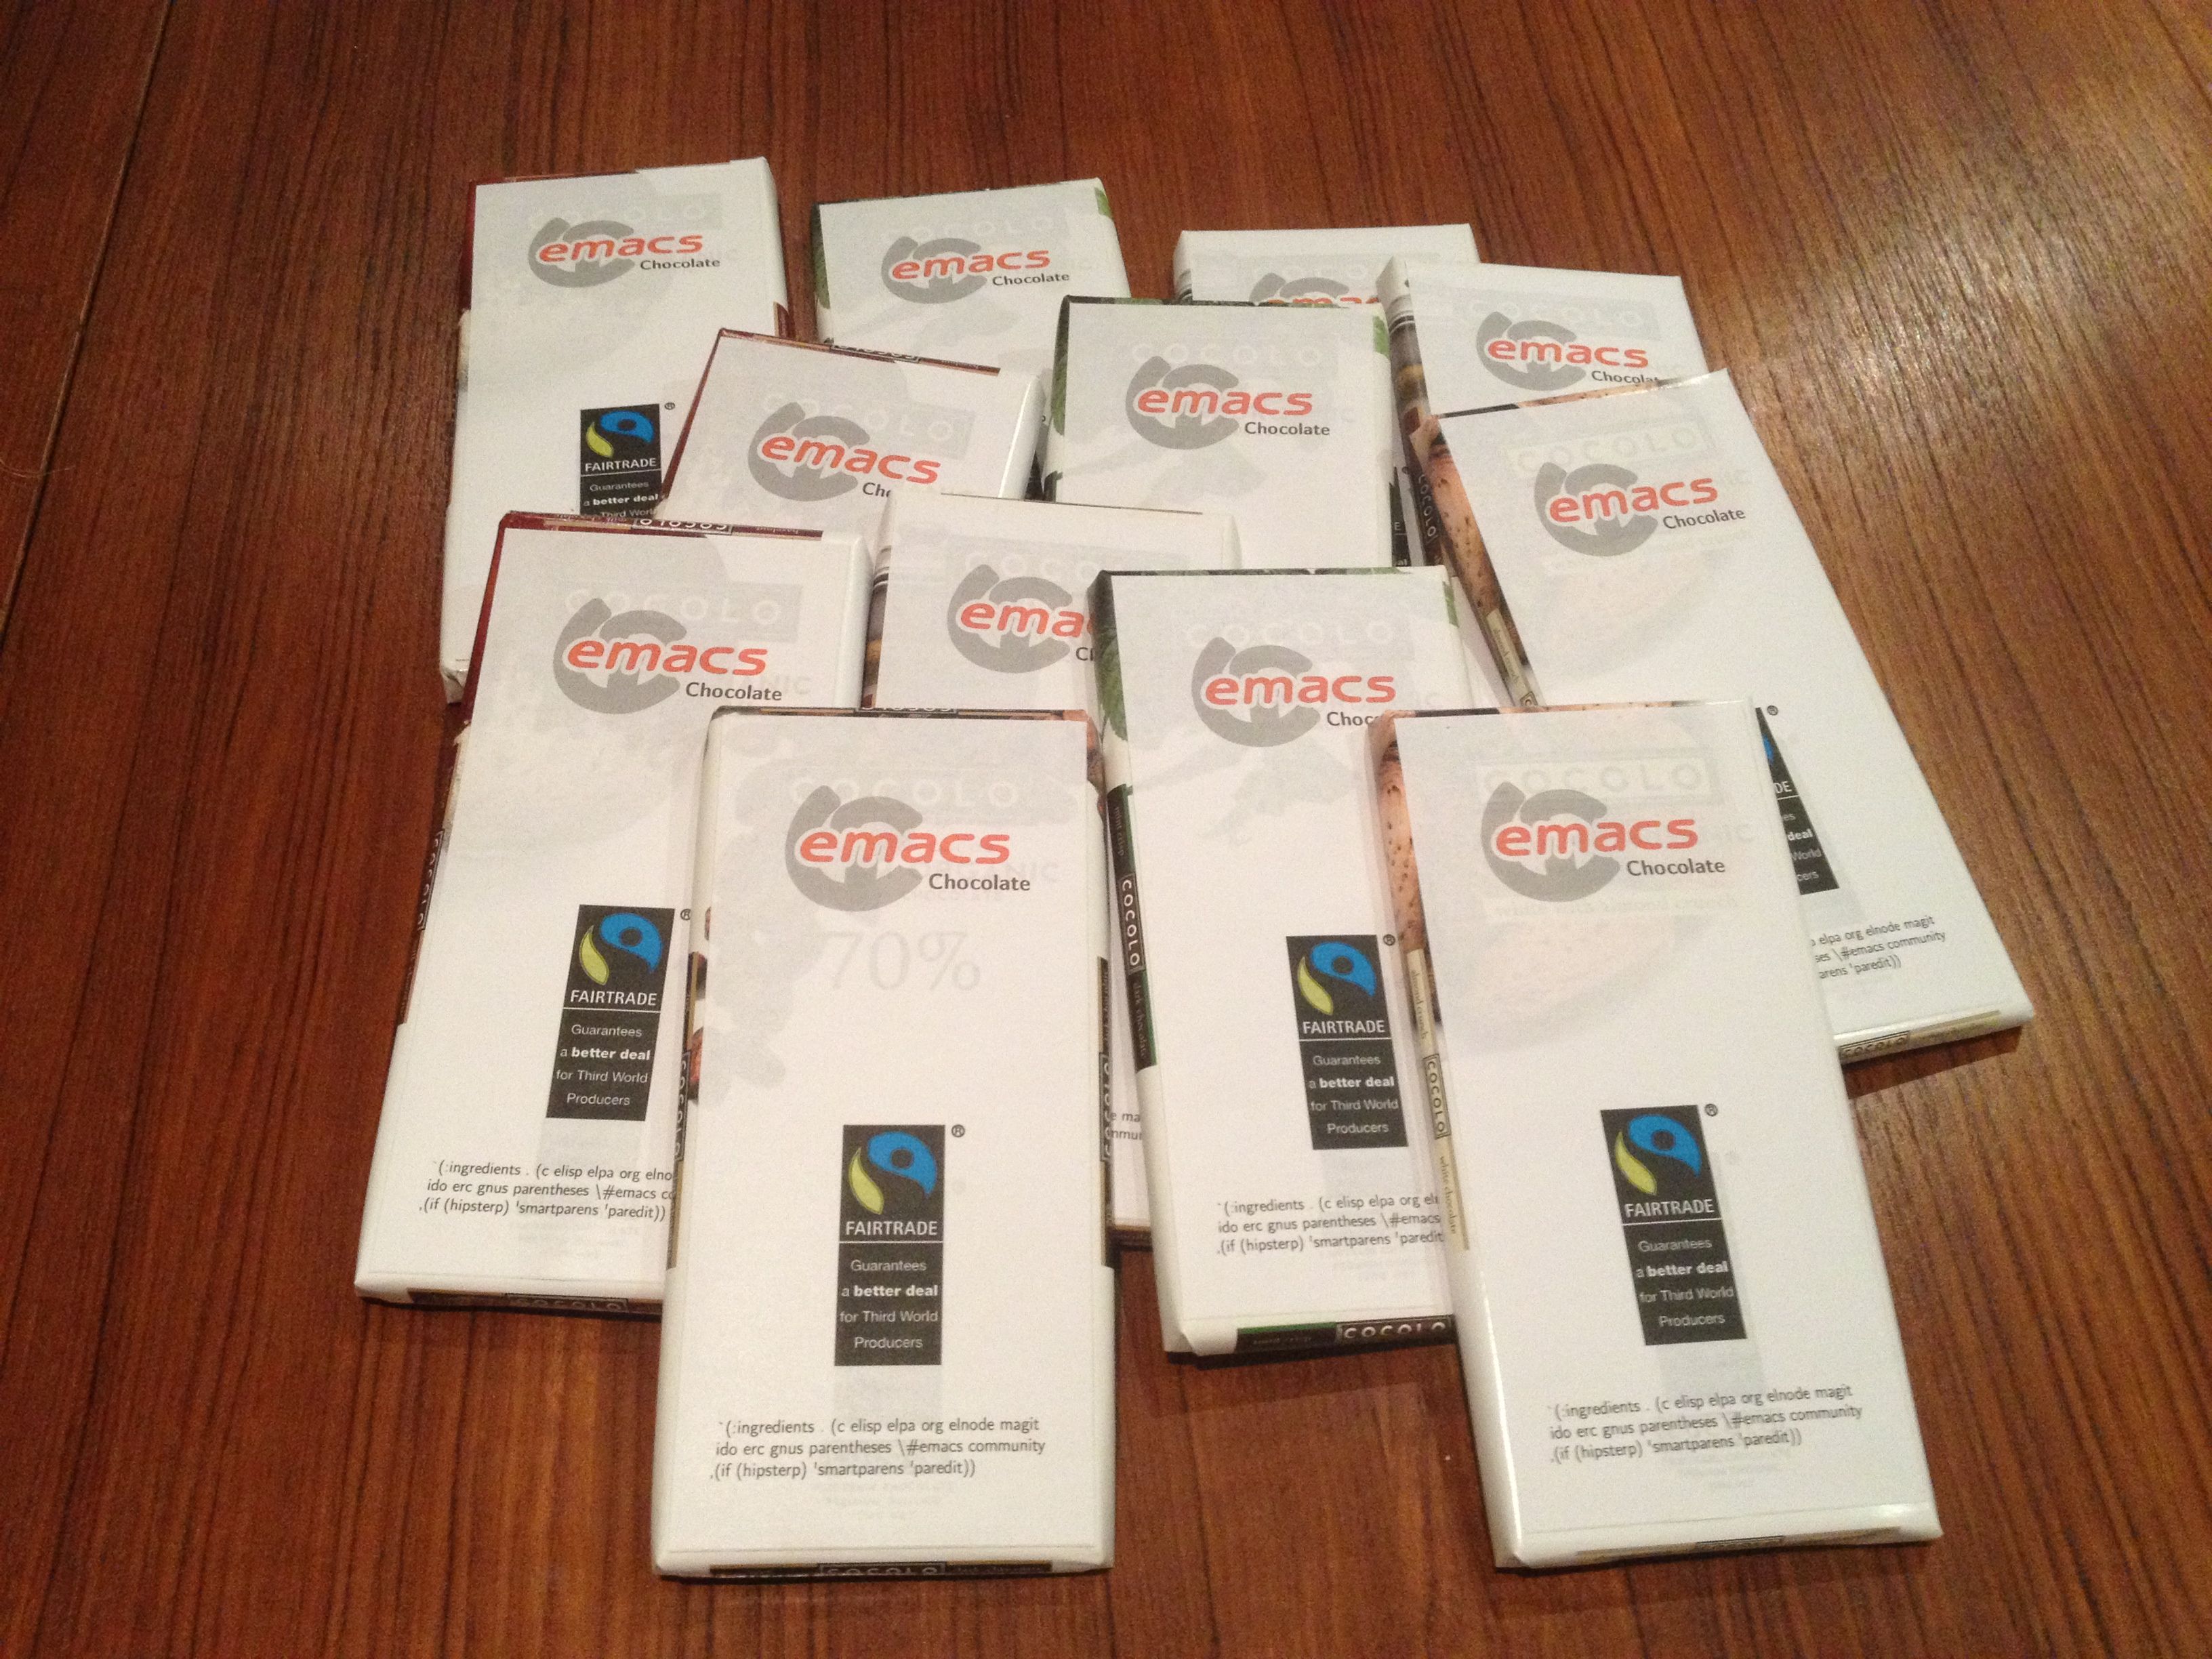
If you want some, come to the Melbourne emacs meetup.
Sofia’s Camberwell.
857 Burke Road
Camberwell 3124
Victoria, Australia
Friday April 26, 2013 6:00 PM
Category: General
-
There will be Emacs Chocolate at the #Emacs Meetup Melbourne
-
Install perl modules automatically using lib::xi
So you’ve downloaded a really cool perl script but it has 200 module dependencies? You could just install them one by one with cpanm or, you could use lib::xi. It automatically installs modules your perl script uses.
 # to install missing libaries automatically
 $ perl -Mlib::xi script.pl
-
OAuth 2.0 in emacs – Part 4
Finally managed to authenticate against WordPress.com using the oauth2 library.
Here is my sample code which returns an access token.(let ((code (oauth2-request-authorization "https://public-api.wordpress.com/oauth2/authorize?blog=jasonblewis.wordpress.com" "2194" "" "" "https://emacstragic.net") )) (oauth2-request-access "https://public-api.wordpress.com/oauth2/token" "2194" "
" code "https://emacstragic.net" ) ) WordPress at least seems to be fussy about what you use as the Redirect URI. It needs to match the uri you set in the app settings of the wordpress developer page or you denied access.
-
OAuth 2.0 in emacs – Part 3
I’m still stuck with WordPress and OAuth 2.0. I sent a support email to them but they have not followed up yet. I did find the problem described on Stack Overflow with no solution yet either.
I thought I might try and get OAuth 2.0 working with a different service.
Twitter does not appear to officially support OAuth 2.0 yet. Twittering mode in emacs authenticates with OAuth 1 and appears to have its own code for doing so.
My next thought was to see if I could find a test OAuth 2.0 server to do my own testing on. I found there is a discussion and links to one on Stack Overflow, but its OAuth 1.
Google! of course, google supports OAuth 2.0. My next steps will be to see if I can authenticate against that from emacs.
A quick search of ELPA revealed the google-contacts package and lo and behold! it was written by Julian Danjou who wrote the OAuth 2 library I am planning to use. It looks like a really good example to follow too.
Then I had the idea that maybe if I try the authentication against a blog hosts on wordpress.com rather than my self hosted WordPress site. And sure enough, that works. So I’m back in business. More in part 4. -
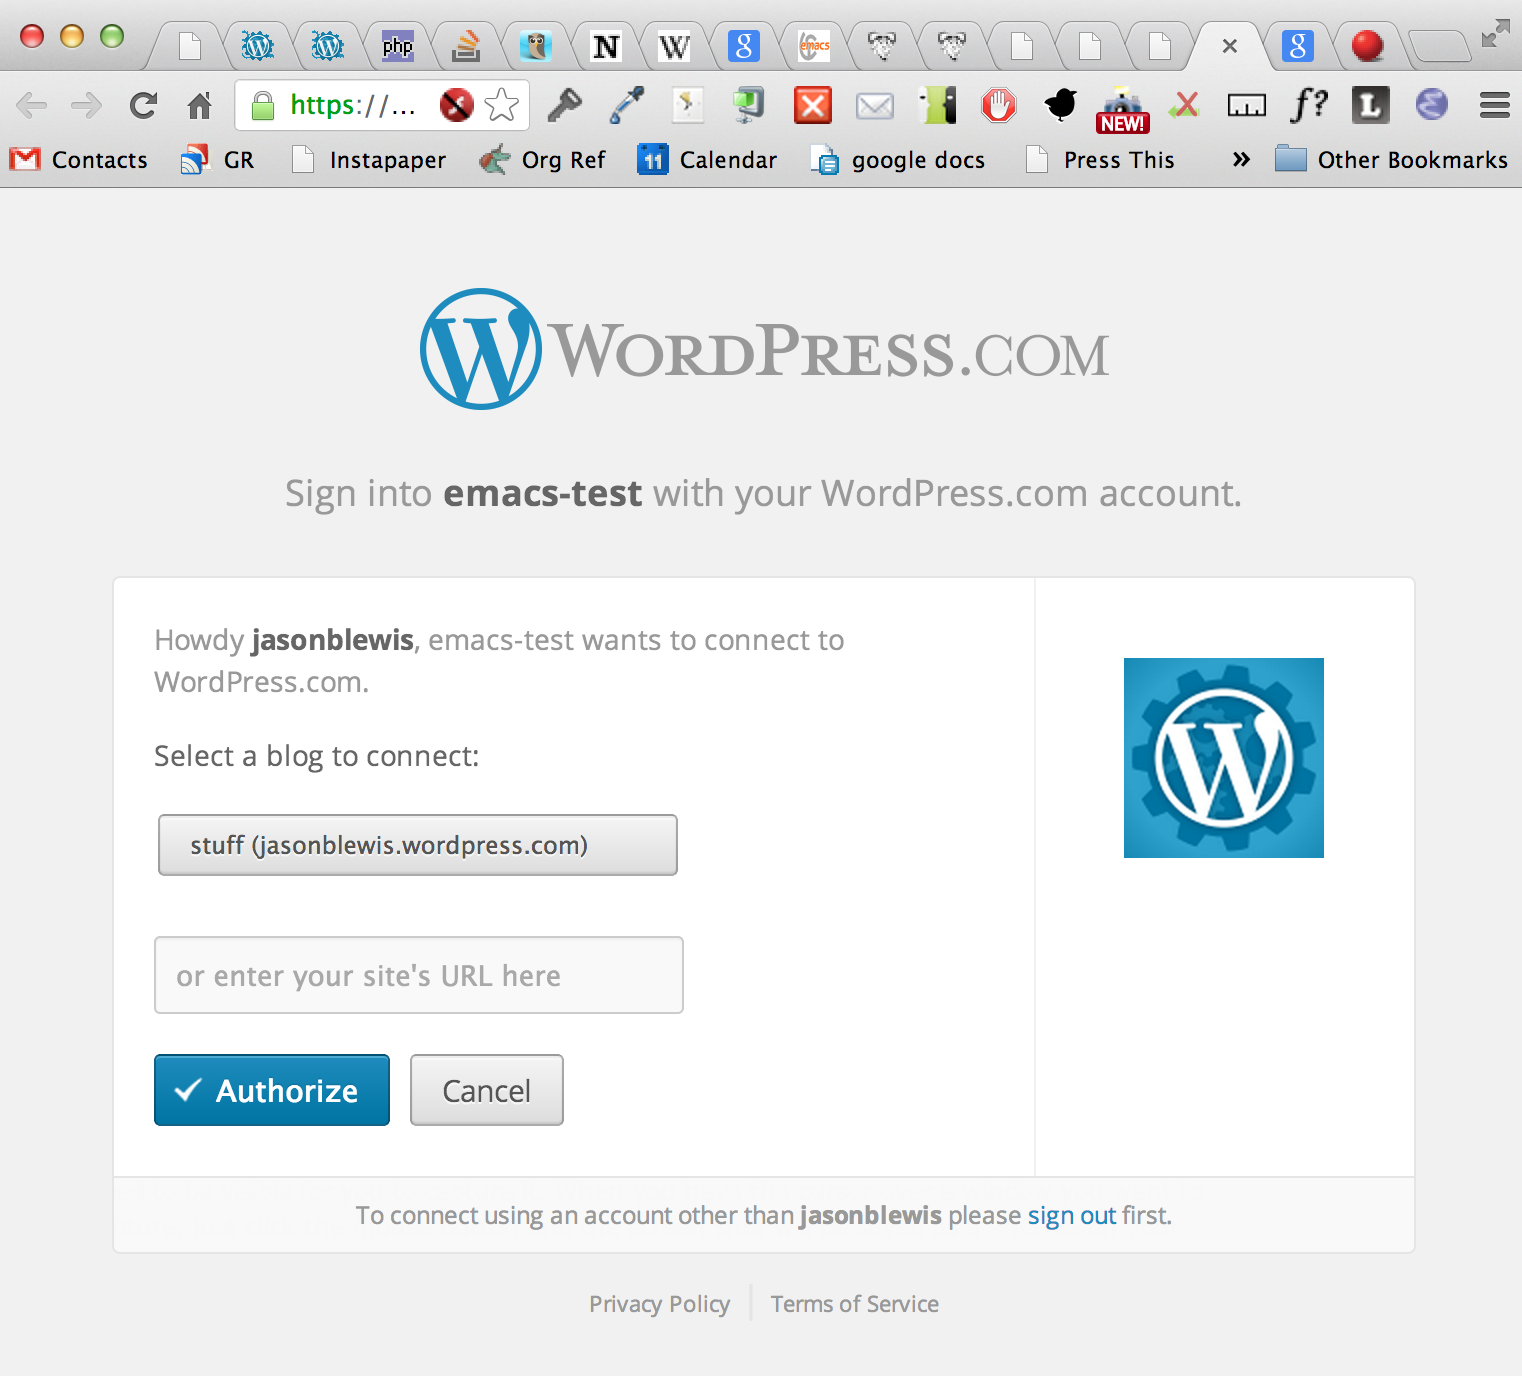
OAuth 2.0 in emacs – Part 2
Back the basics.
Reading through the docs again I decided try and and authorise using this url first.
https://public-api.wordpress.com/oauth2/authorize?client_id=2194&redirect_uri=https://emacstragic.net&response_type=code
This takes me to a wordpress.com page to ask me to authorise.
So, then it started to make sense to me.(oauth2-request-authorization "https://public-api.wordpress.com/oauth2/authorize" "2194" "" "" "https://emacstragic.net")
That above function launches your browser on the wordpress OAuth page and asks you to authorise the app to one of your blogs. It also prompts the user in emacs to enter the authorisation code the browser displays.

But selecting my blog and hitting Authrorize gives me an errorYou must connect your Jetpack plugin to WordPress.com to use this feature.which is strange because it is already connected. -
Australian emacs users mailing list
During the emacs BoF at LCA2013 we decided to set up a mailing list for Australian users.
Ben has now set it up and it can be reached here:
Emacs-au-discuss
-
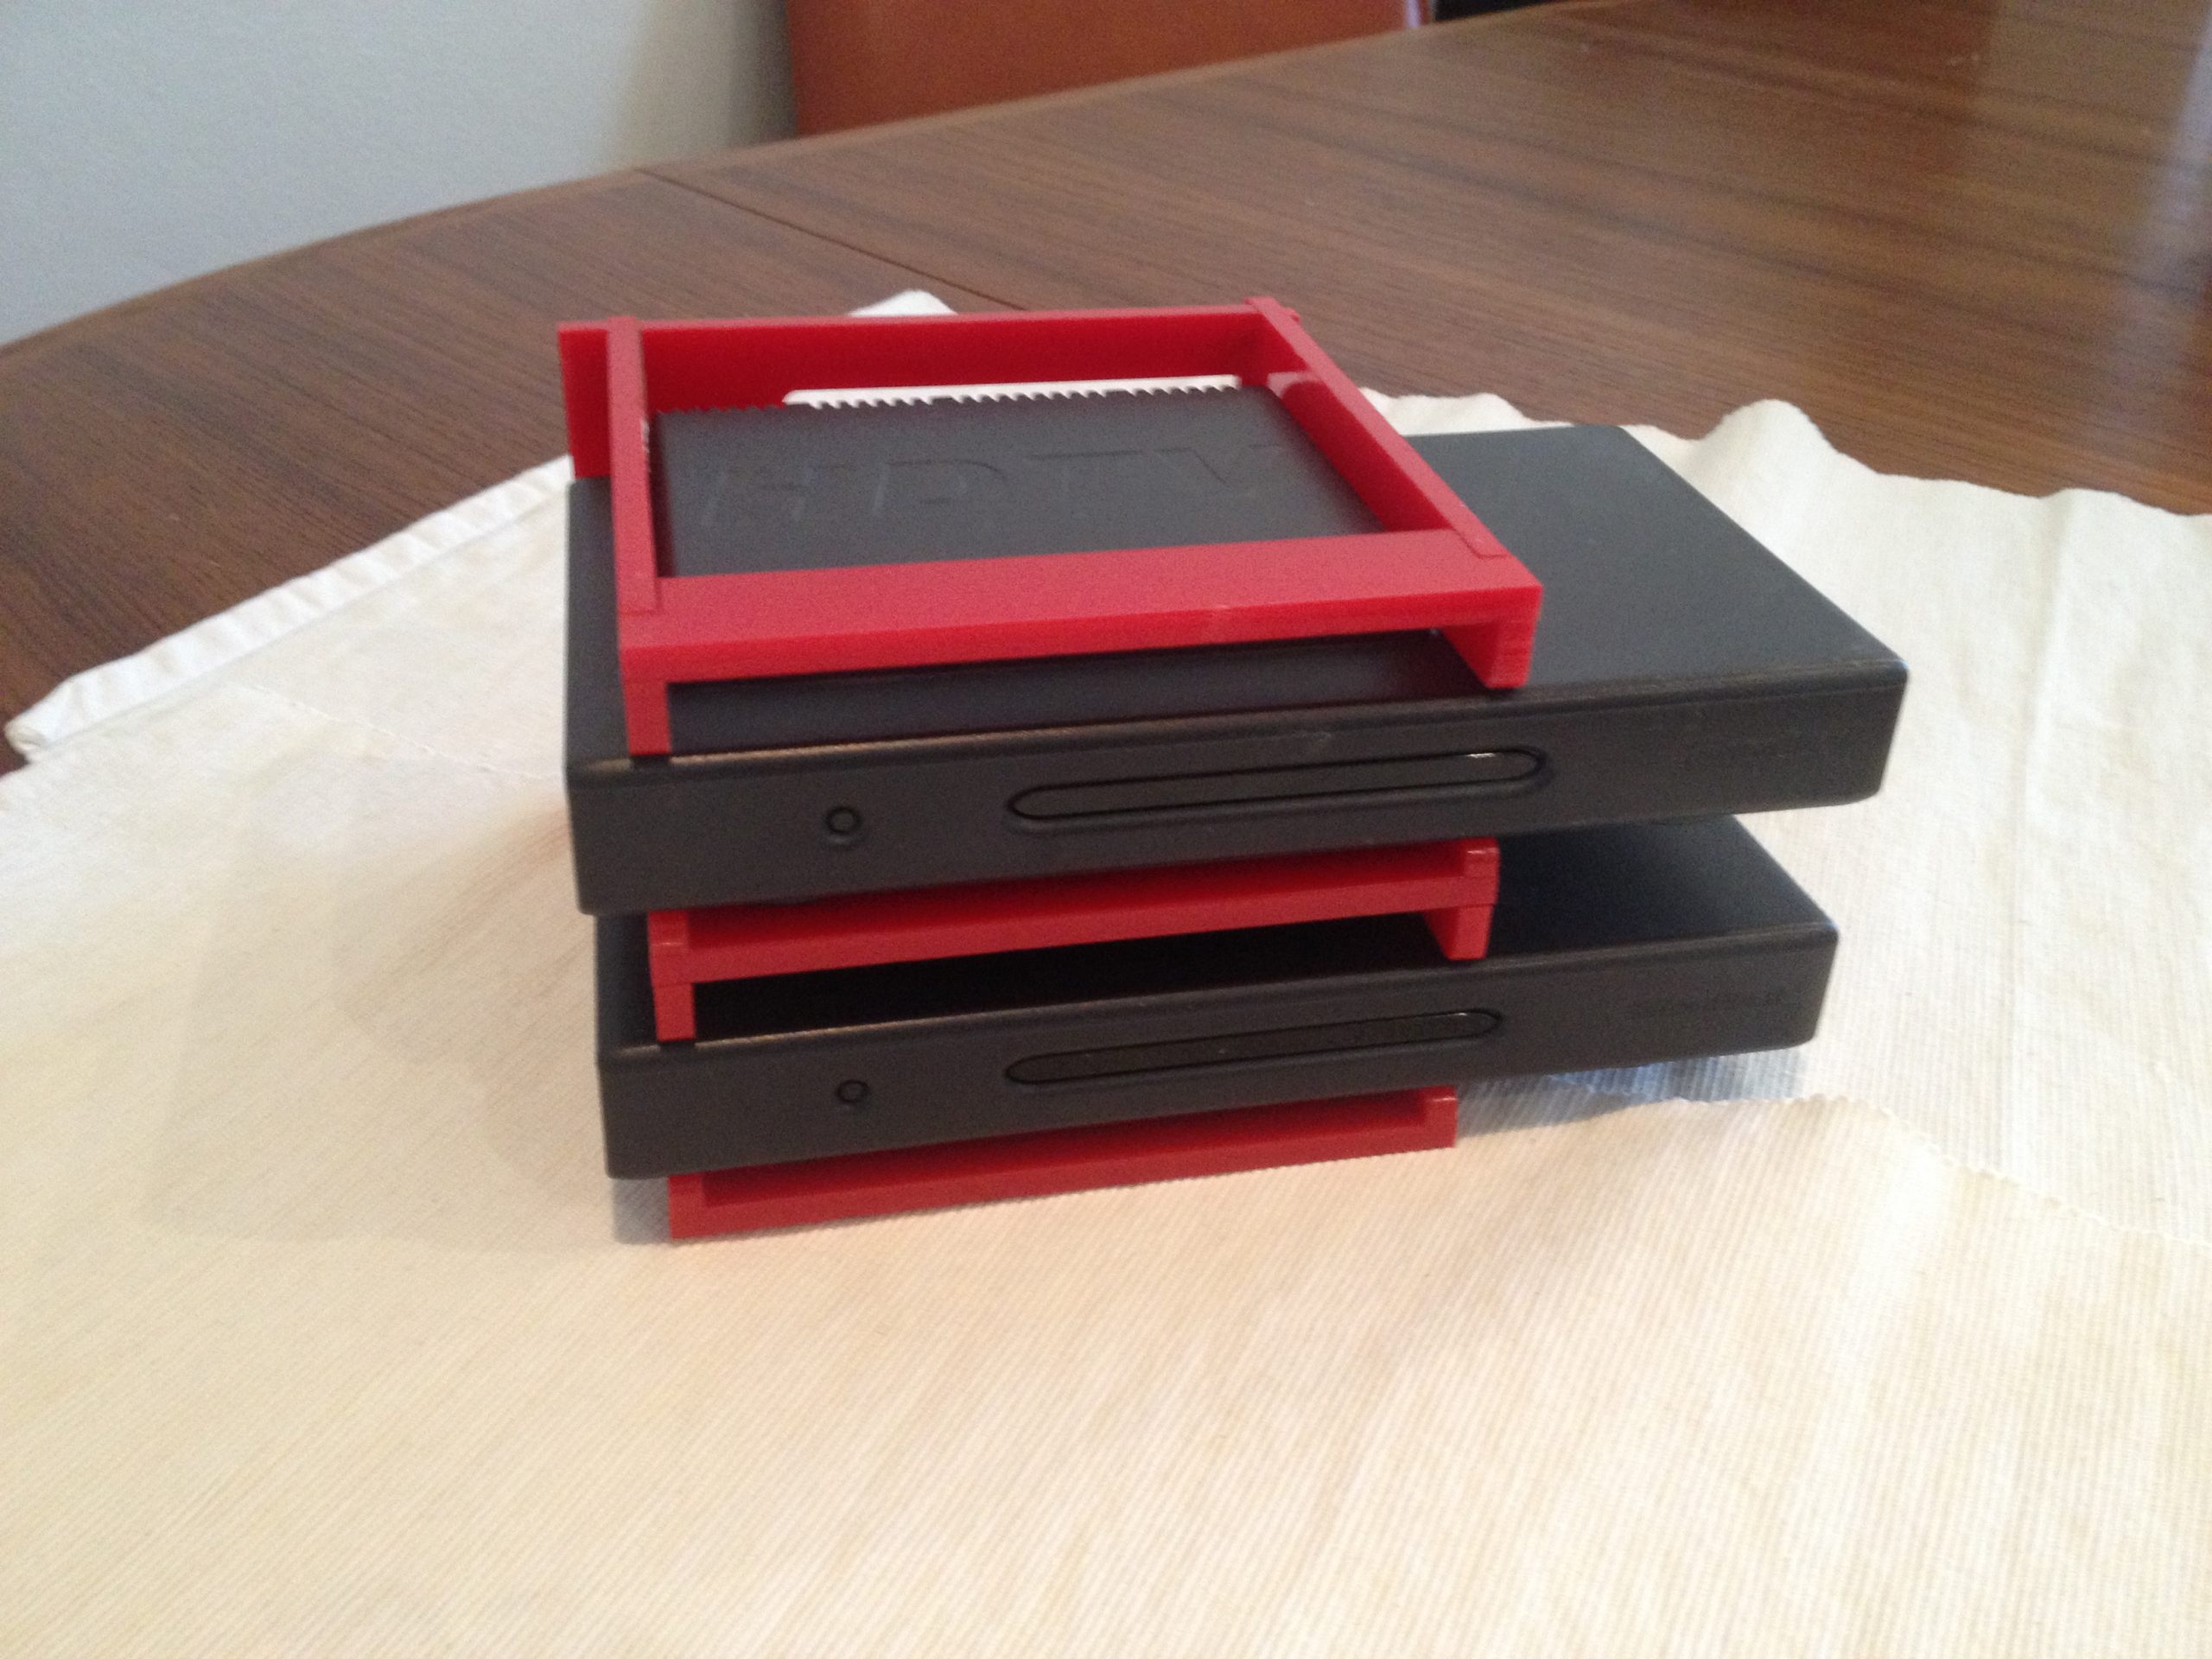
Laser cut stand for HDHomerun
I got sick of my HDHomeruns not stacking nicely so I made a stand on the lasercutter for them.

Front view of HDHomerun Stand cut on laser cutter 
Rear view of HDHomerun Stand cut on laser cutter -
Watering System
I’ve been working on installing a watering system in my garden. Even though it seems simple on the surface, it took me a while to work out how to do things.
Part 1 – The Solenoid Valves and Manifold
First of all I sketeched out the garden beds I wanted to install the irrigation system into, and then I planned how many runs of dripper line I wanted. For the garden beds in question I needed two lines and three lines respectively.
The garden beds are on the side of our house with the closest water source being under the kitchen sink. I decided to install the solenoid valves and manifold under the kitchen sink. I put together my bill of materials and bought from Wet Earth who have been very helpful in advising me.
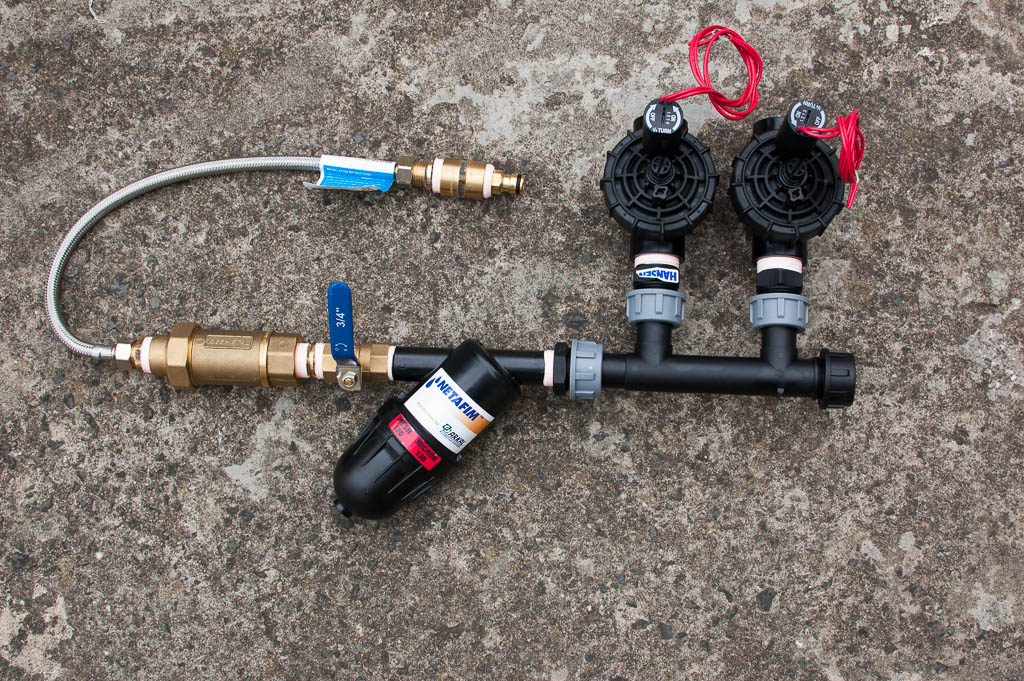
I measured the space available under the sink and put the pieces together to ensure they would fit. My first mistake was not testing the whole rig before installing. I found that it leaked and I spent a hours fiddling around under the sink trying to fix it. It was very difficult working under the sink and in the end pulled the whole lot out so I could test it all for leaks on the bench. I made a little test harness which you can see in the center of the photo below. It allowed me to connect the hose to the system and leave it pressurised to look for leaks.
Solenoid Valves and Manifold and Filter
Starting from the top middle and following around anti-clockwise are:- Hose adaptor for testing purposes
- Flexi hose.
- Back flow prevention valve
- Ball valve so I can turn the whole thing off if I need to.
- Filter
- Manifold
- 2 x Hunter Jar Top solenoide Valves
Under my sink there was already an unused tee in the cold water line. I’ll connect the flexi hose to that. I have heard that these flexi lines don’t last for ever and they need to be changed every 5-10 years or so.
The biggest problem I had was that all my threaded connections leaked. I was using plumber’s pink thread tape (the thicker stuff) but they still leaked. I asked at the pluming shop and was told that I should wind the thick tape twice around the thread before screwing them together, which I duly did, but it still leaked. I went back to the plumbing shop and asked more advice and was told that I should be wrapping the thread in 6-10 turns of the thick tape. Once I did that the seals were good. The guy at the irrigation shop told me to use 9 turns of thick tape, or 18 turns of thin on the black nylon glass re-inforced threaded fittings. This seems to be working well too.
After testing on the bench I finally managed to seal all the threaded connections only to find the valve heads were leaking, slow leaks but definitely leaking. I called Wet Earth and they told me to pull the head off the valve and ensure the diaphragms were clean. I did this and repressurised the system on my test harness. After leaving it at full presssure for several hours, and very slow drips coming out of the valve heads, it eventually seemed dry up. I suspect there was water in the thread or between the diaphragm and the head of the collar of the valve that was slowly dripping out making me think it was leaking, but the water eventually dried up and thats why I think it was just water in the thread.
I was using spanners for working on the various bits but then I got some molegrips and I have found these to be much better for the job. Much quicker to get parts on and off. Also molegrips open up mich wider. My 10″ shifter wasn’t wide enough for the nyglass fittings.Part 2 – Dripper Lines
I made the ends for the dripper lines on the bench. For each bed I needed a head which would consist of 2 elbows, a tee for the water inlet and a vacuum break, and a tail consisting of 2 elbows, and a automatic flush valve. I measured up the 13mm poly tubing and put it together. I started out using hot water to warm the pipe to make it easier to insert the barbed fittings but then I had the idea of using the heat gun. The heat gun is much easer. I also found that the 13mm poly tubing was quite easy to straighten by using the heat gun to warm a section of pipe, and then holding it straight while it cools. It makes things slightly easier to work with, not having the pipe bending all over the place. It is easy to overheat the poly pipe with the heat gun though so you do have to be careful with it.
I laid the dripper line in the beds and hooked up the head and tail ends I made earlier. Incidentally I found the mole grips were also very good here for squeezing closed the poly pipe clips.

Drip Line and Flush Valve
Above you can see three dripper lines (the middle one is a bit obscured) and the round automatic flush valve. The pipes are held in place with retaining pins. They are useful for holding things in place as you lay the pipes and connect things up. I spaced the lines 25cm appart in this bed. The drippers are spaced at 30cms in the dripper line.

Three Dripper Lines

Vacuum Breaker and distribution into the dripper lines
Above you can see the vacuum break valve and the way I ran the 13mm poly pipe to the dripper lines. In hindsight I could have probably made that quite a bit neater if I had used a 4 way cross splitter.

13mm Poly pipes coming through the kitchen wall

13mm Dripper lines

Flush Valve and a tap I added to ease manual flushing of the lines Part 3 – The Controller
I have long wished for a web interface based watering system controller. I finally found what I was after in OpenSprinkler by Rays Hobby. It is an arduino based sprinkler controller that is fully open. Software and hardware designs are fully available. I ordered one as soon as it was announced and Ray was very helpful in sending it out to me. I was perhaps a little hasty though as I have v1 of the board and its now up to v1.4. From what I can see the main benefits are that the newer board has a better way of connecting the Solenoid terminals so you can easily connect and disconnect the whole lot. I’ve also been experiencing stability issues with my controller. It seems to hang on power on most of the time and only successfully boots ones every 10-20 power cycles. I’ve not yet had time to look into solving those problems.The controller lacks a battery backup so once you lose power, you have to re-load the configuration again. Ray came up with a hack to add external battery backup but its not very elegant. More recent versions have built in FTDI so you can program it directly from your computer. Mine requires an ISP programmer to program it and its a bit fiddly to do.I have just noticed that the new boards store all settings in the firmware so yet another reason to consider upgrading.The video of the 1.4 version seems very good. Especially the ability to manually turn on and off stations which I imagine will be very good for testing.I’ll post an update when I make more progress on this project. -
Expadirk: a hack to split PDFs and email based on instructions within
Sune Vuorela wrote a post asking people to make sure their private hacks become public. That inspired me to publish Expadirk.
Expadirk is my solution to my accounting software provider requiring me to purchase yet more proprietary software in order to send statements, purchase orders and invoices by email.
The accounting package has a way of outputting print runs as PDF. In order to email them, the user has to set up BroadGun Software’s PDFMachine. PDFMachine provides a virtual printer that processes incoming PDFs, splits them into individual PDFs and emails them off as per instructions embedded within the PDF.
It seemed like a perfect task for a bit of perl. I wrote it about two years ago but never got around to posting it. In that time it has successfully sent thousands of emails including our monthly statement run which is about 200-300 emails.
I installed Expadirk on my linux box as a cups-pdf printer and shared that printer via samba. Then I connected the Windows machines to the shared printer to give them the PDF emailing capability.
I added 2 features not in PDFMachine. Our accounting package had no way of specifying the from email address, so I added a <from></from> tag to the email body. Expadirk will use whatever is in the from tag as the from address if it finds one.
Our accounting package did not have a way to specify that you want to print and email particular documents so I added a <print> tag. If Expadirk finds <print> in the body of the email it will send the PDF to the printer as well and emailing it.
You can find the code on github. -

I broke my favourite mug
About 18 or so years ago (I can’t believe it was that long ago) a friend (Jules, drop me a line if you read this?) from Canberra gave me this mug. She picked mugs with similar messages for me, Damo and Stevo. Mine said “Only my computer understands me”, I think Damo’s said “Do I look like a fucking help desk?” I can’t remember what Stevo’s said. I do remember thinking at the time that she really chose the mugs well.
I used my mug nearly every day I drank literately thousands of coffees from it. Anyway, it slipped out of my hand while I was washing it the other day.
Oh well, end of an era.